All the love of the family for little Alexander on the occasion of his Baptism, and we took care of the decoration...
Blog categories
Search in blog
Latest posts
-
 Alexander Baptism 2024/10/30Read more
 -
 Lavinia's Baptism 2024/06/2828/06/2024Posted in: Events2537 views 0 LikedRead more
We had the honor to organize Lavinia's party, a very sweet little girl who received the Holy Baptism. For her, her...
-
 Hot-air balloon baptism 2024/06/1717/06/2024Posted in: Events836 views 0 LikedRead more
info@tempodifesta.comWe celebrated the Holy Baptism of little Tommaso by creating the party decorations in green...
-
 40th wedding anniversary 2024/05/3129/05/2024Posted in: Events885 views 0 LikedRead more
A lot of love in the air to celebrate 40 years of marriage. A lunch with family and close friends to celebrate one of...
-
 Confirmation Party inspired by The Incredibles 2024/05/2828/05/2024Posted in: Community927 views 0 LikedRead more
Another collaboration with l'Angoletto restaurant in Viterbo, this time to celebrate Marco's Confirmation with a...
Popular posts
-
 How to make a Little Donkey Piñata, Mexican Parties 2019/10/1814/10/2019Posted in: DIY projects25443 views 7 comments 0 LikedHow to make a Little Donkey Piñata, Mexican PartiesRead more
 -
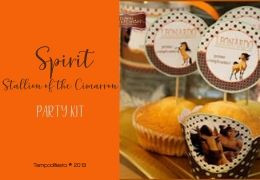 Customized party inspired by Spirit 07/31/201904/10/2019Posted in: Our party kits14093 views 2 comments 0 LikedCustomized party inspired by Spirit Stallion of the CimarronRead more
 -
 How to create cardboard paper Butterfly Wings 2015/02/201621/04/2020Posted in: DIY projects13591 views 0 LikedWe’ll make cardboard paper Butterfly Wings, a last minute idea for a carnival costumeRead more
 -
 Masha and the Bear theme party 02/23/201830/09/2019Posted in: Community12892 views 0 LikedTo celebrate the 2nd birthday of her daughter, her mom organized a Masha and the Bear theme partyRead more
 -
 How to create the tin man 11/07/201728/09/2019Posted in: DIY projects12090 views 0 LikedHow to create the tin man from The Wizard of OZ using old tins, a very creative recyclingRead more



Latest comments